What do you get when you combine these?

I wasn’t sure, but I had a blank wall in my guest bedroom and two blank canvases daring me to find out.
Time for some DIY wall art. Care to join me? Here’s the step by step.
Step 1: Decide on a general design.
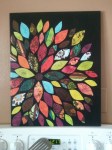
It certainly doesn’t have to be my idea (lily pads on water) or Pinterest’s (leaves on black). As a matter of fact, it’s better if it’s something all your own. Take time to think about it. The wall will wait.
Step 2: Paint the background.
My daughter and I made an afternoon out of it. I usually just paint the coloring-book pages she’s painting, but as I got absorbed in my work, I realized: “It’s good for her to see me creating something I enjoy, too.”
Much like reading in front of kids, doing your own art in front of them demonstrates an activity you value and enjoy (beyond the TV, computer, phone, or even games, as much as I love them).
I had acrylic paints on hand, but you could use any paints really, even house samples or kids paints. Then paint until it looks like what you want (or at least, something you can live with).

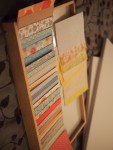
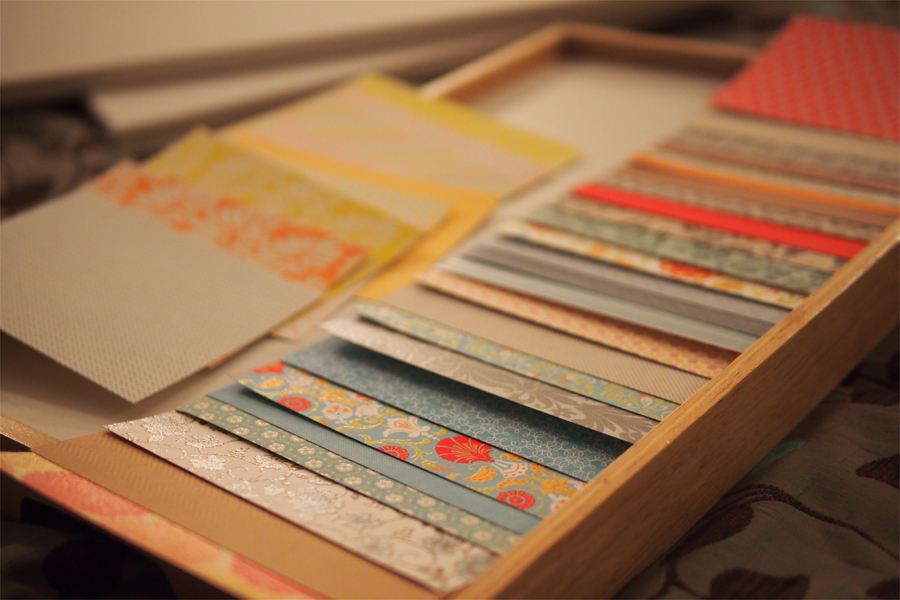
Step 3: Choose your paper(s) and shapes to layer on top.
For the paper, I had two variety packs, which you can get at most craft stores. TIP: With the extras, you can make photo mats for your picture frames.
As I said, for the shape, I chose lily pads. They remind me of visiting my grandparents’ lake cabin when I was girl. Plus, they’re something peaceful about them that I wanted to convey to my guests.
What shape would you choose? Make sure it’s simple enough you don’t throw a bunch away in a frustrated fit. (Yeah, you’re not the only one.)
Step 4: Cut out your shapes.
You could make a template with a sturdy piece of card stock or just eyeball it.
If you want a dimensional effect, use a gradient of sizes (like mine). If you want to keep it simple, make them all the same shape and size (like the Pinterest example).
Step 5: Arrange and glue on your shapes.
The arranging took awhile. I laid it on the bed in the guest room and picked at it when I wandered by until it looked the way I wanted.
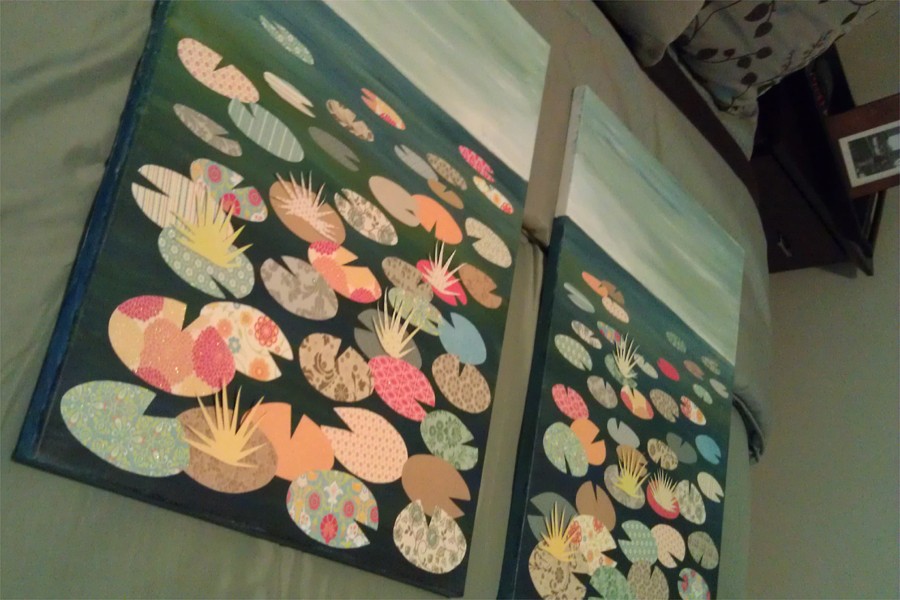
Then I glued them in place with a matte Modge Podge. You could use regular glue or rubber cement, too, I suppose, but I can’t guarantee it won’t mess up your paint, especially if any oozes out. Modge Podge is forgiving like that.
Step 6: Seal it.
Again, Modge Podge. It won’t make the paint or the paper bleed (as long as your paint is well dried, of course).
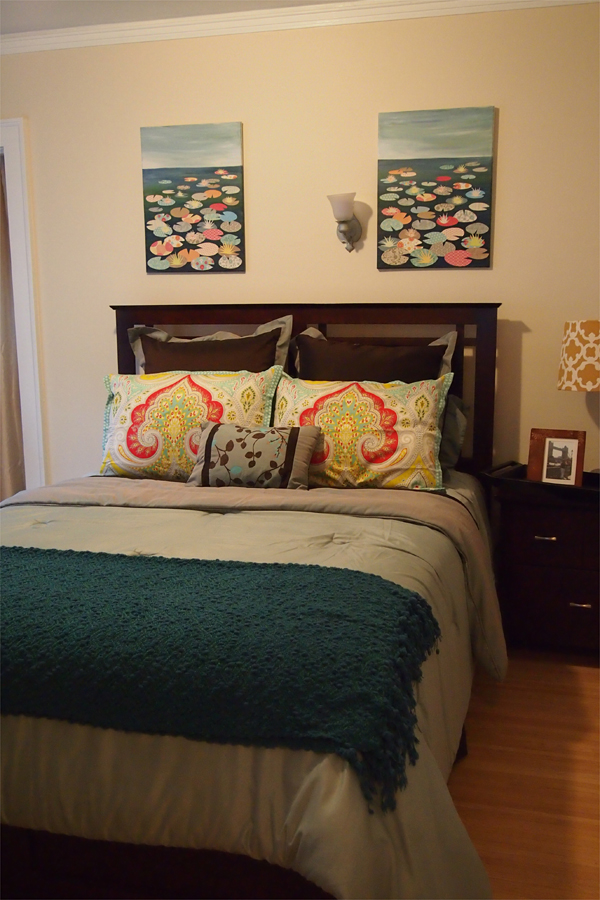 And there you go! It’s no Picasso, but it’s personal, meaningful, and specially crafted for the room and who it’s made for. Even Picasso couldn’t say that about The Two Saltimbanques.
To my guests, both here on the blog and in my home: May you always be welcome and inspired.
Looking for more ideas? Check out this project made from old newspaper or my full collection of Home Art ideas on Pinterest.

6 thoughts on “DIY Wall Art”