 Here’s an idea if you need to decorate on a budget or are thinking ahead to DIY holiday gifts.
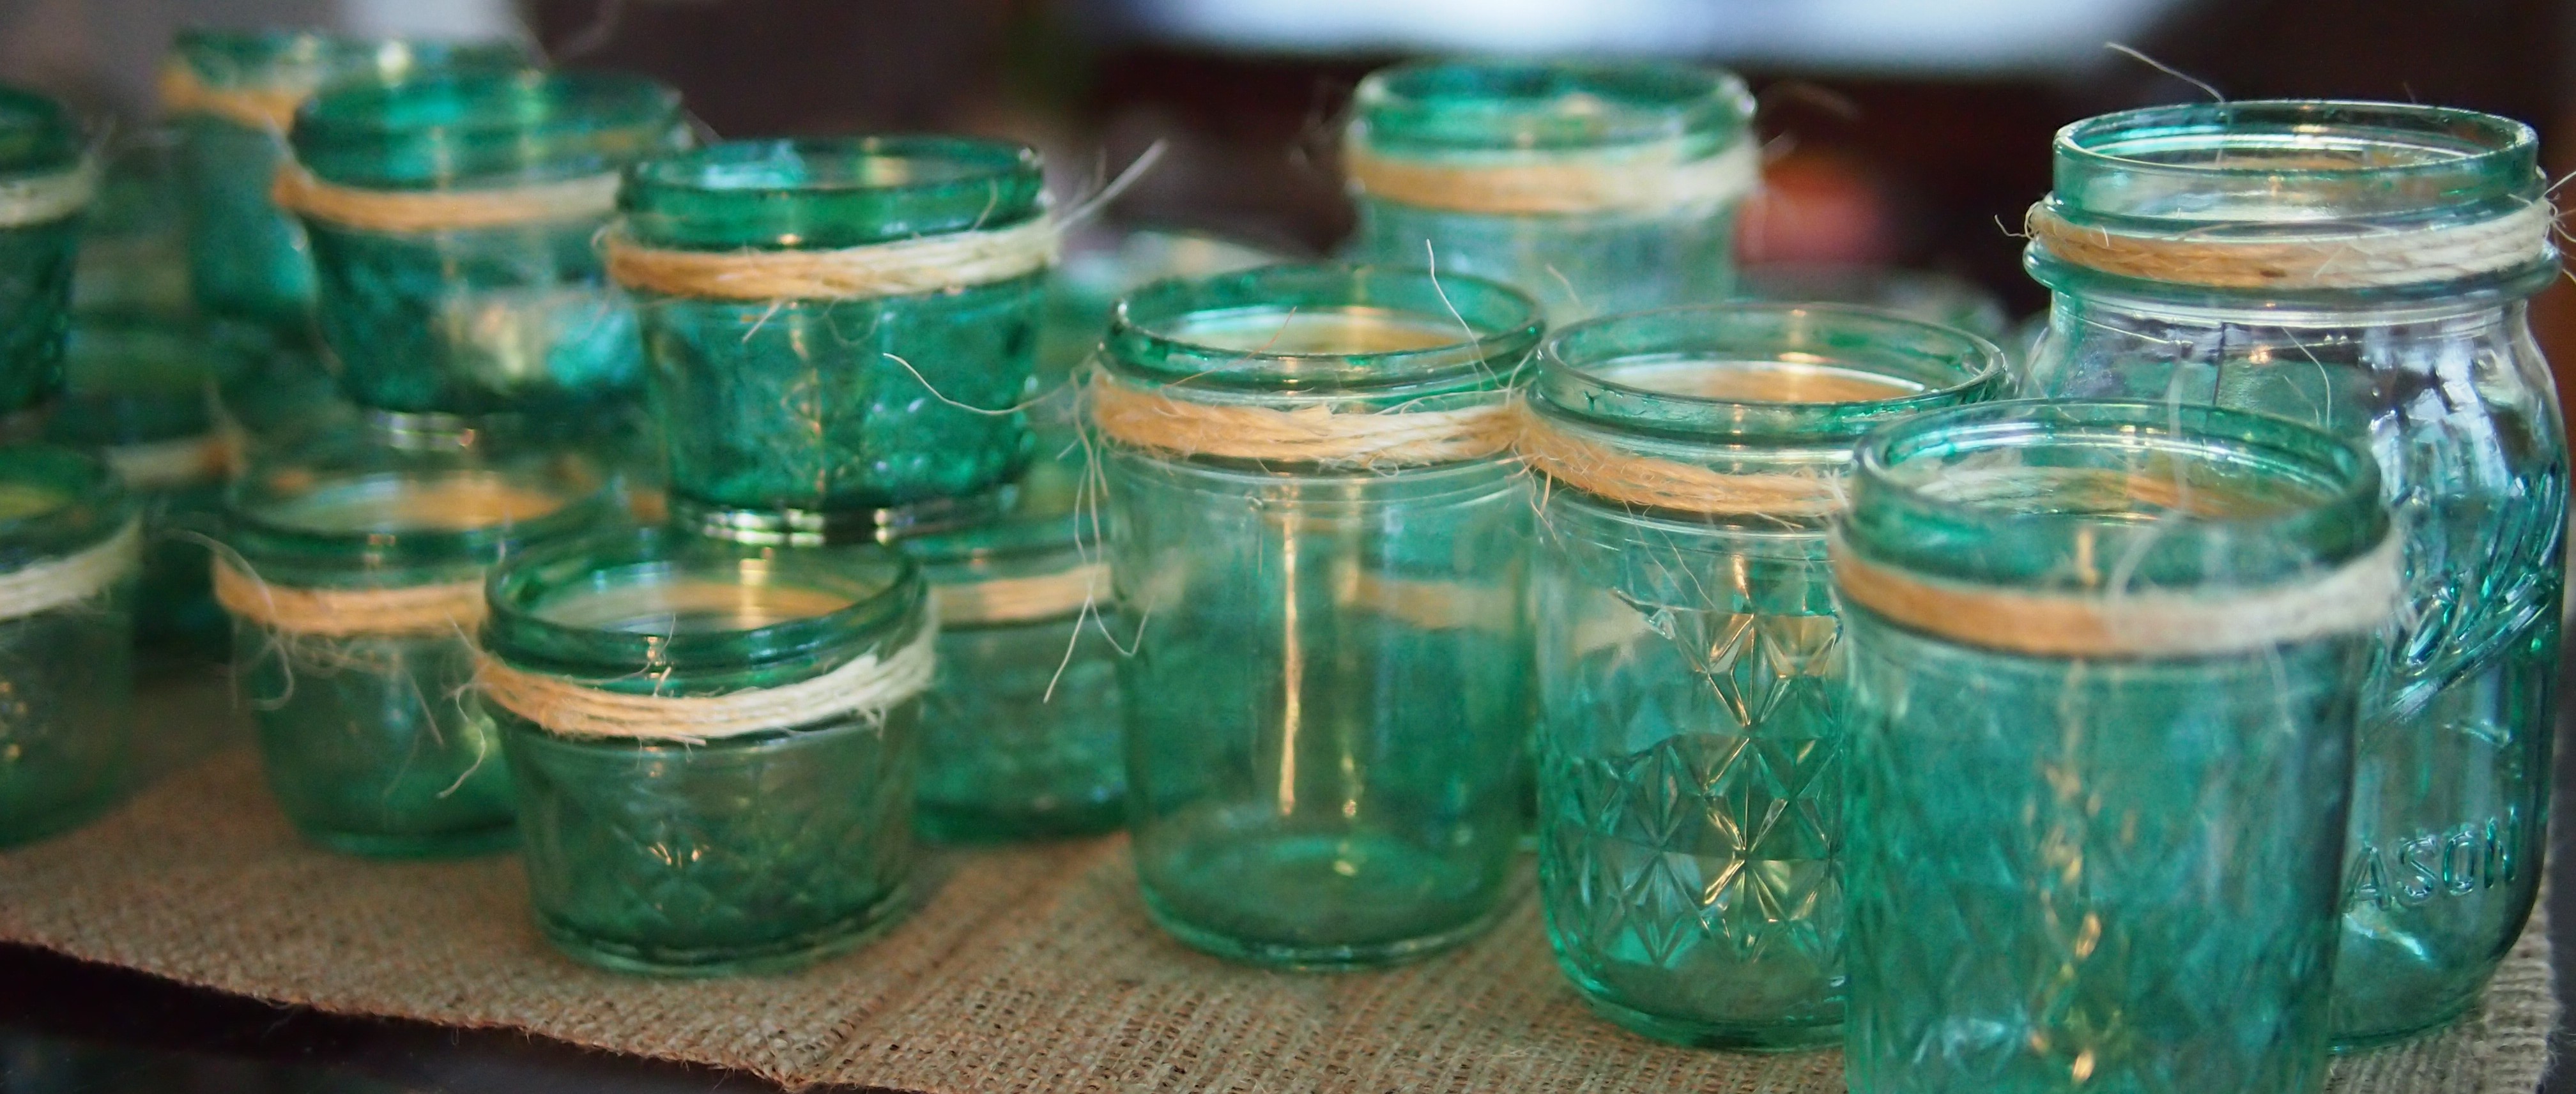
I recently made a bunch of tinted mason jars in bulk for a friend’s wedding, and I was pleasantly surprised by how they turned out. We filled them with candles and used them in the table centerpieces, on walkways, on buffet tables, etc.
You can crank out a bunch in an afternoon, and they’re pretty darn charming.
 What you need:
- Mason Jars
- Mod Podge (Gloss)
- Food coloring
- Bowl (preferably disposable) for mixing
- Wax paper
- Candles
Optional:
- Twine
- Glue gun
- Candle “anchor” substrate: sand, glitter, tiny seashells, etc.
What you do:
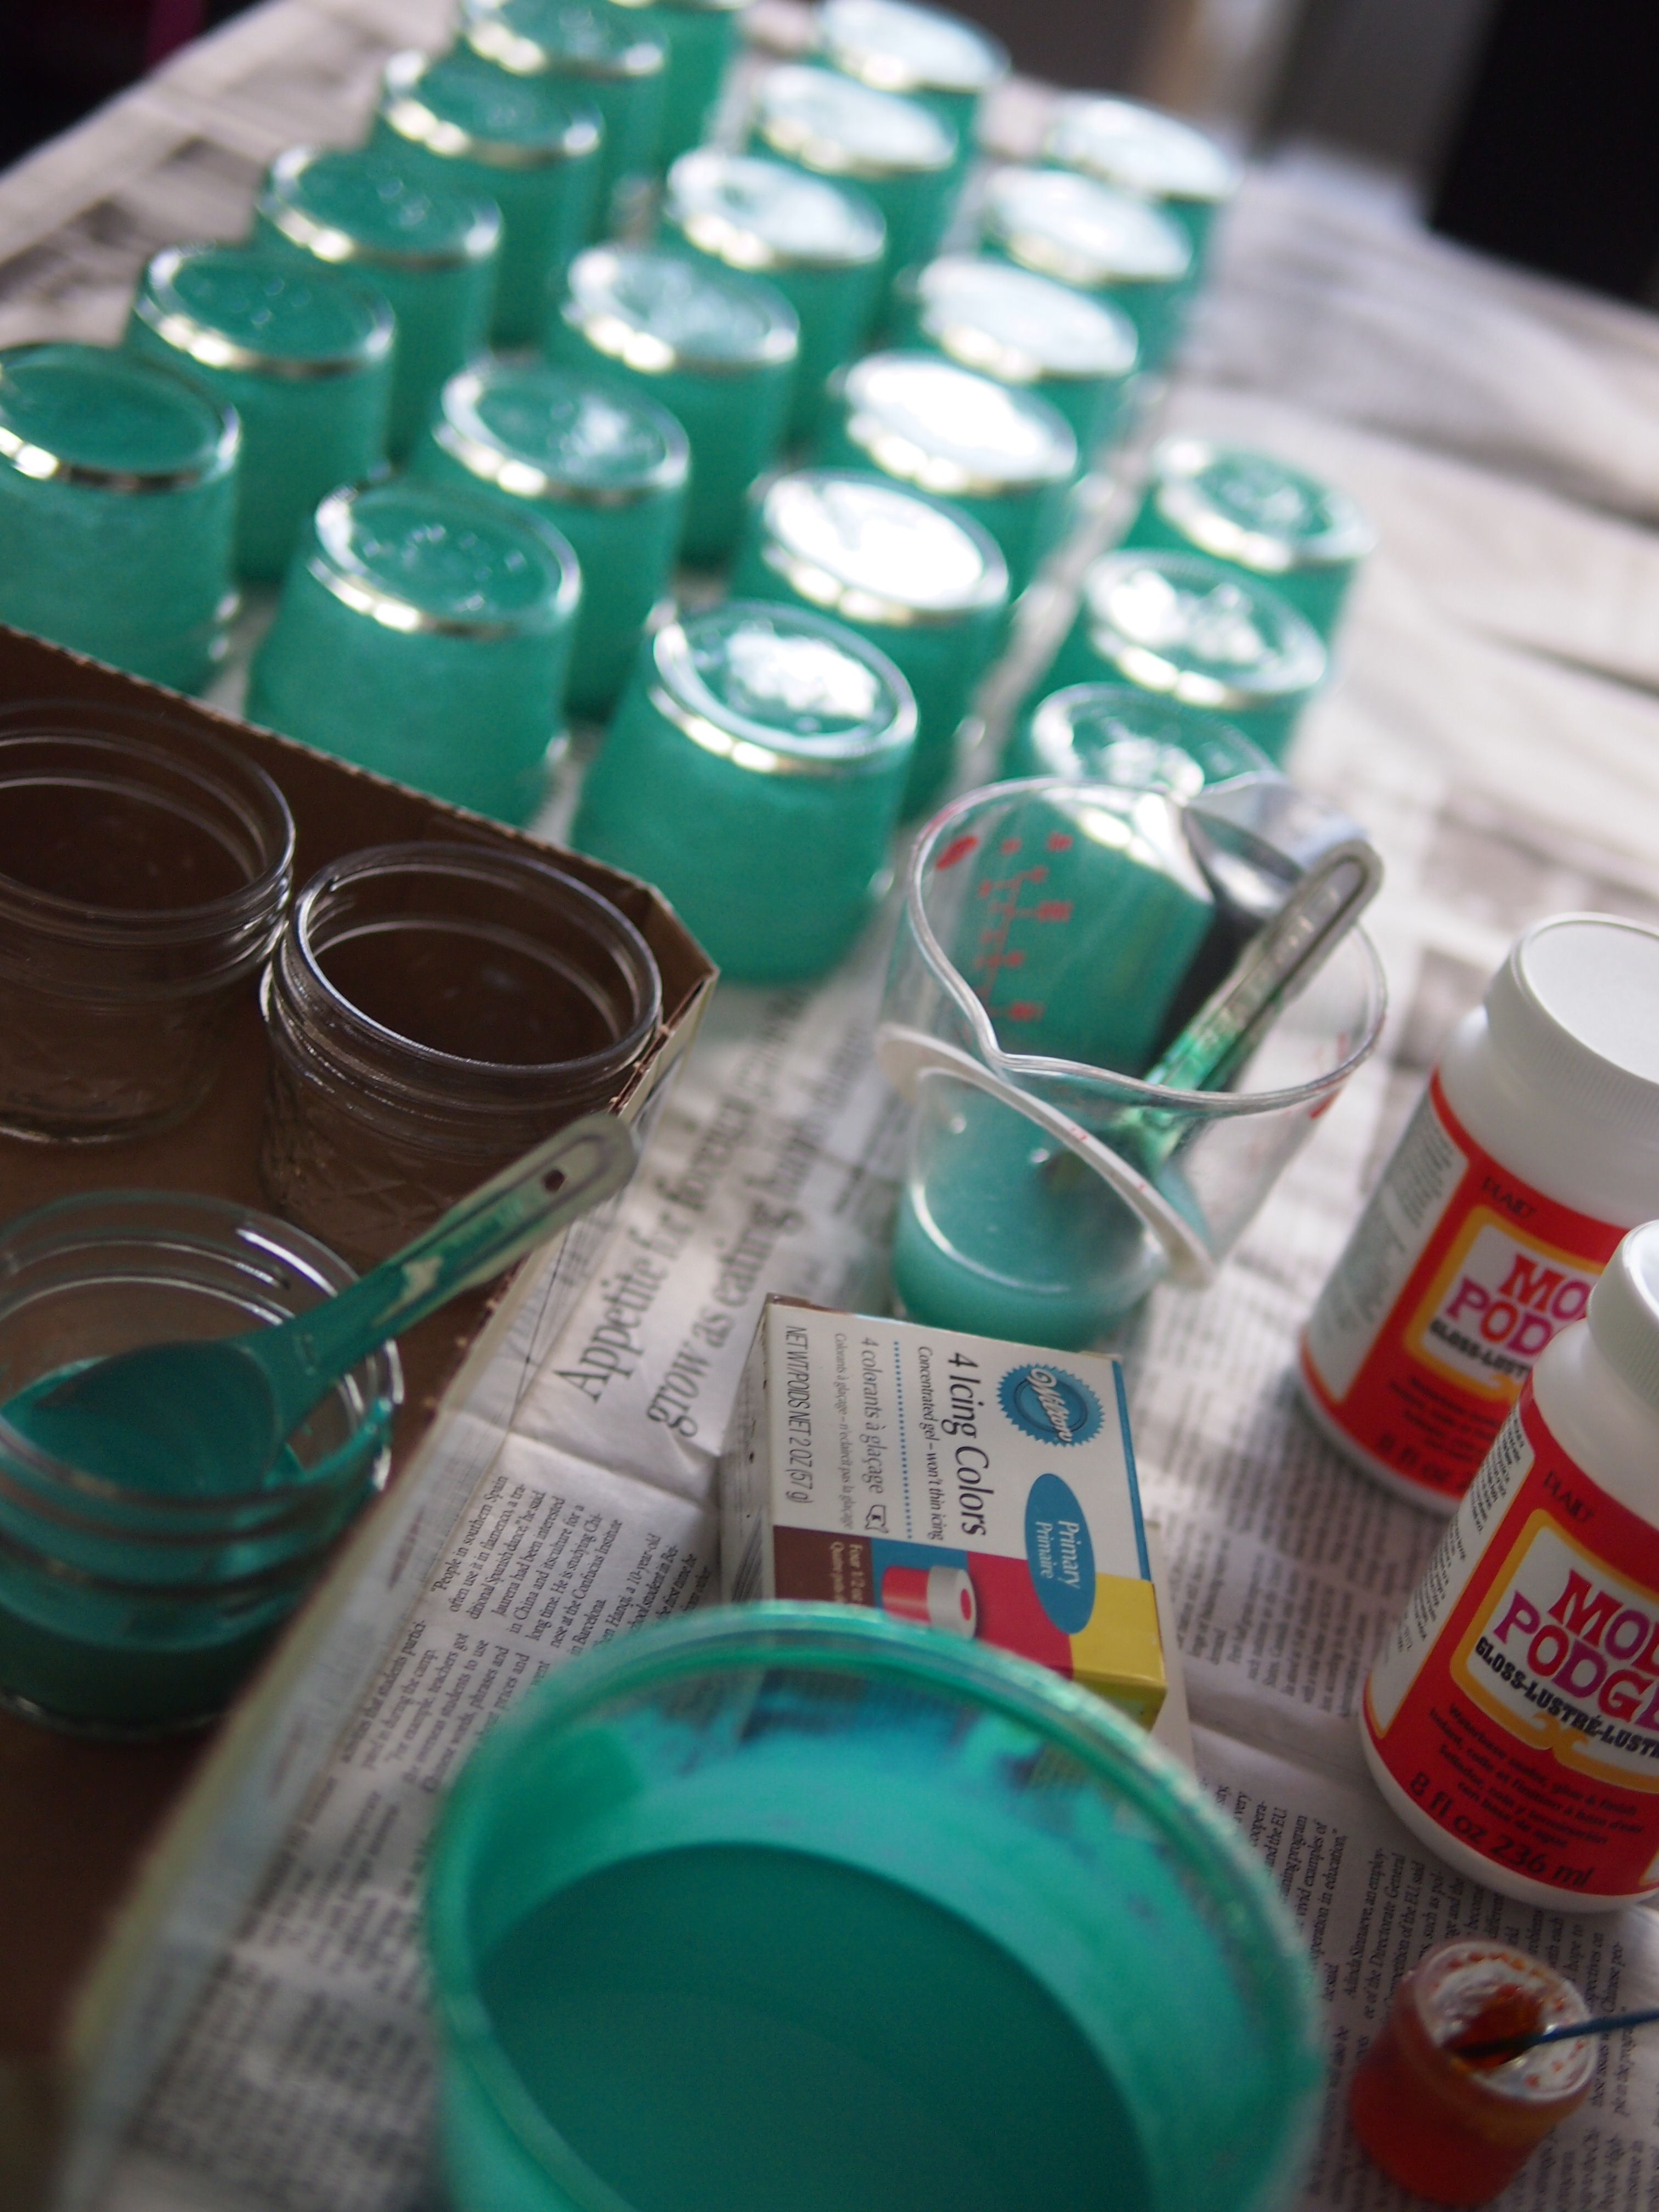
1. Mix
For about every eight jars, mix 2 T Modge Podge, 1 t water, and your preferred amount of food coloring in your bowl. (Note: The color will show up slightly lighter and see-through once it dries, so go a little darker than you’d like.)
2. Coat
Pour about a tablespoon of this mixture into the first jar. With a bowl underneath, carefully twist the jar around, coating the whole inside with the mod podge/food coloring mixture. Pour the excess back into the full mixture amount. Repeat with the other jars.
3. Dry
Let each jar dry upside down on the wax paper for a minimum of 30 minutes, shifting them often to keep them from sticking.
4. Bake
Move the jars (face down) to a wax-paper-covered cookie sheet. Bake in an oven set on “Warm” or the lowest setting for about 20 minutes. Flip the jars right-side-up, and put back in the oven for another 20 minutes. Remove from the oven, and transfer with tongs to a fresh sheet of wax paper.
Again, moving them like this really helps prevent a sticky mess. Trust me. I ended up shifting them a few times while cooling, too.
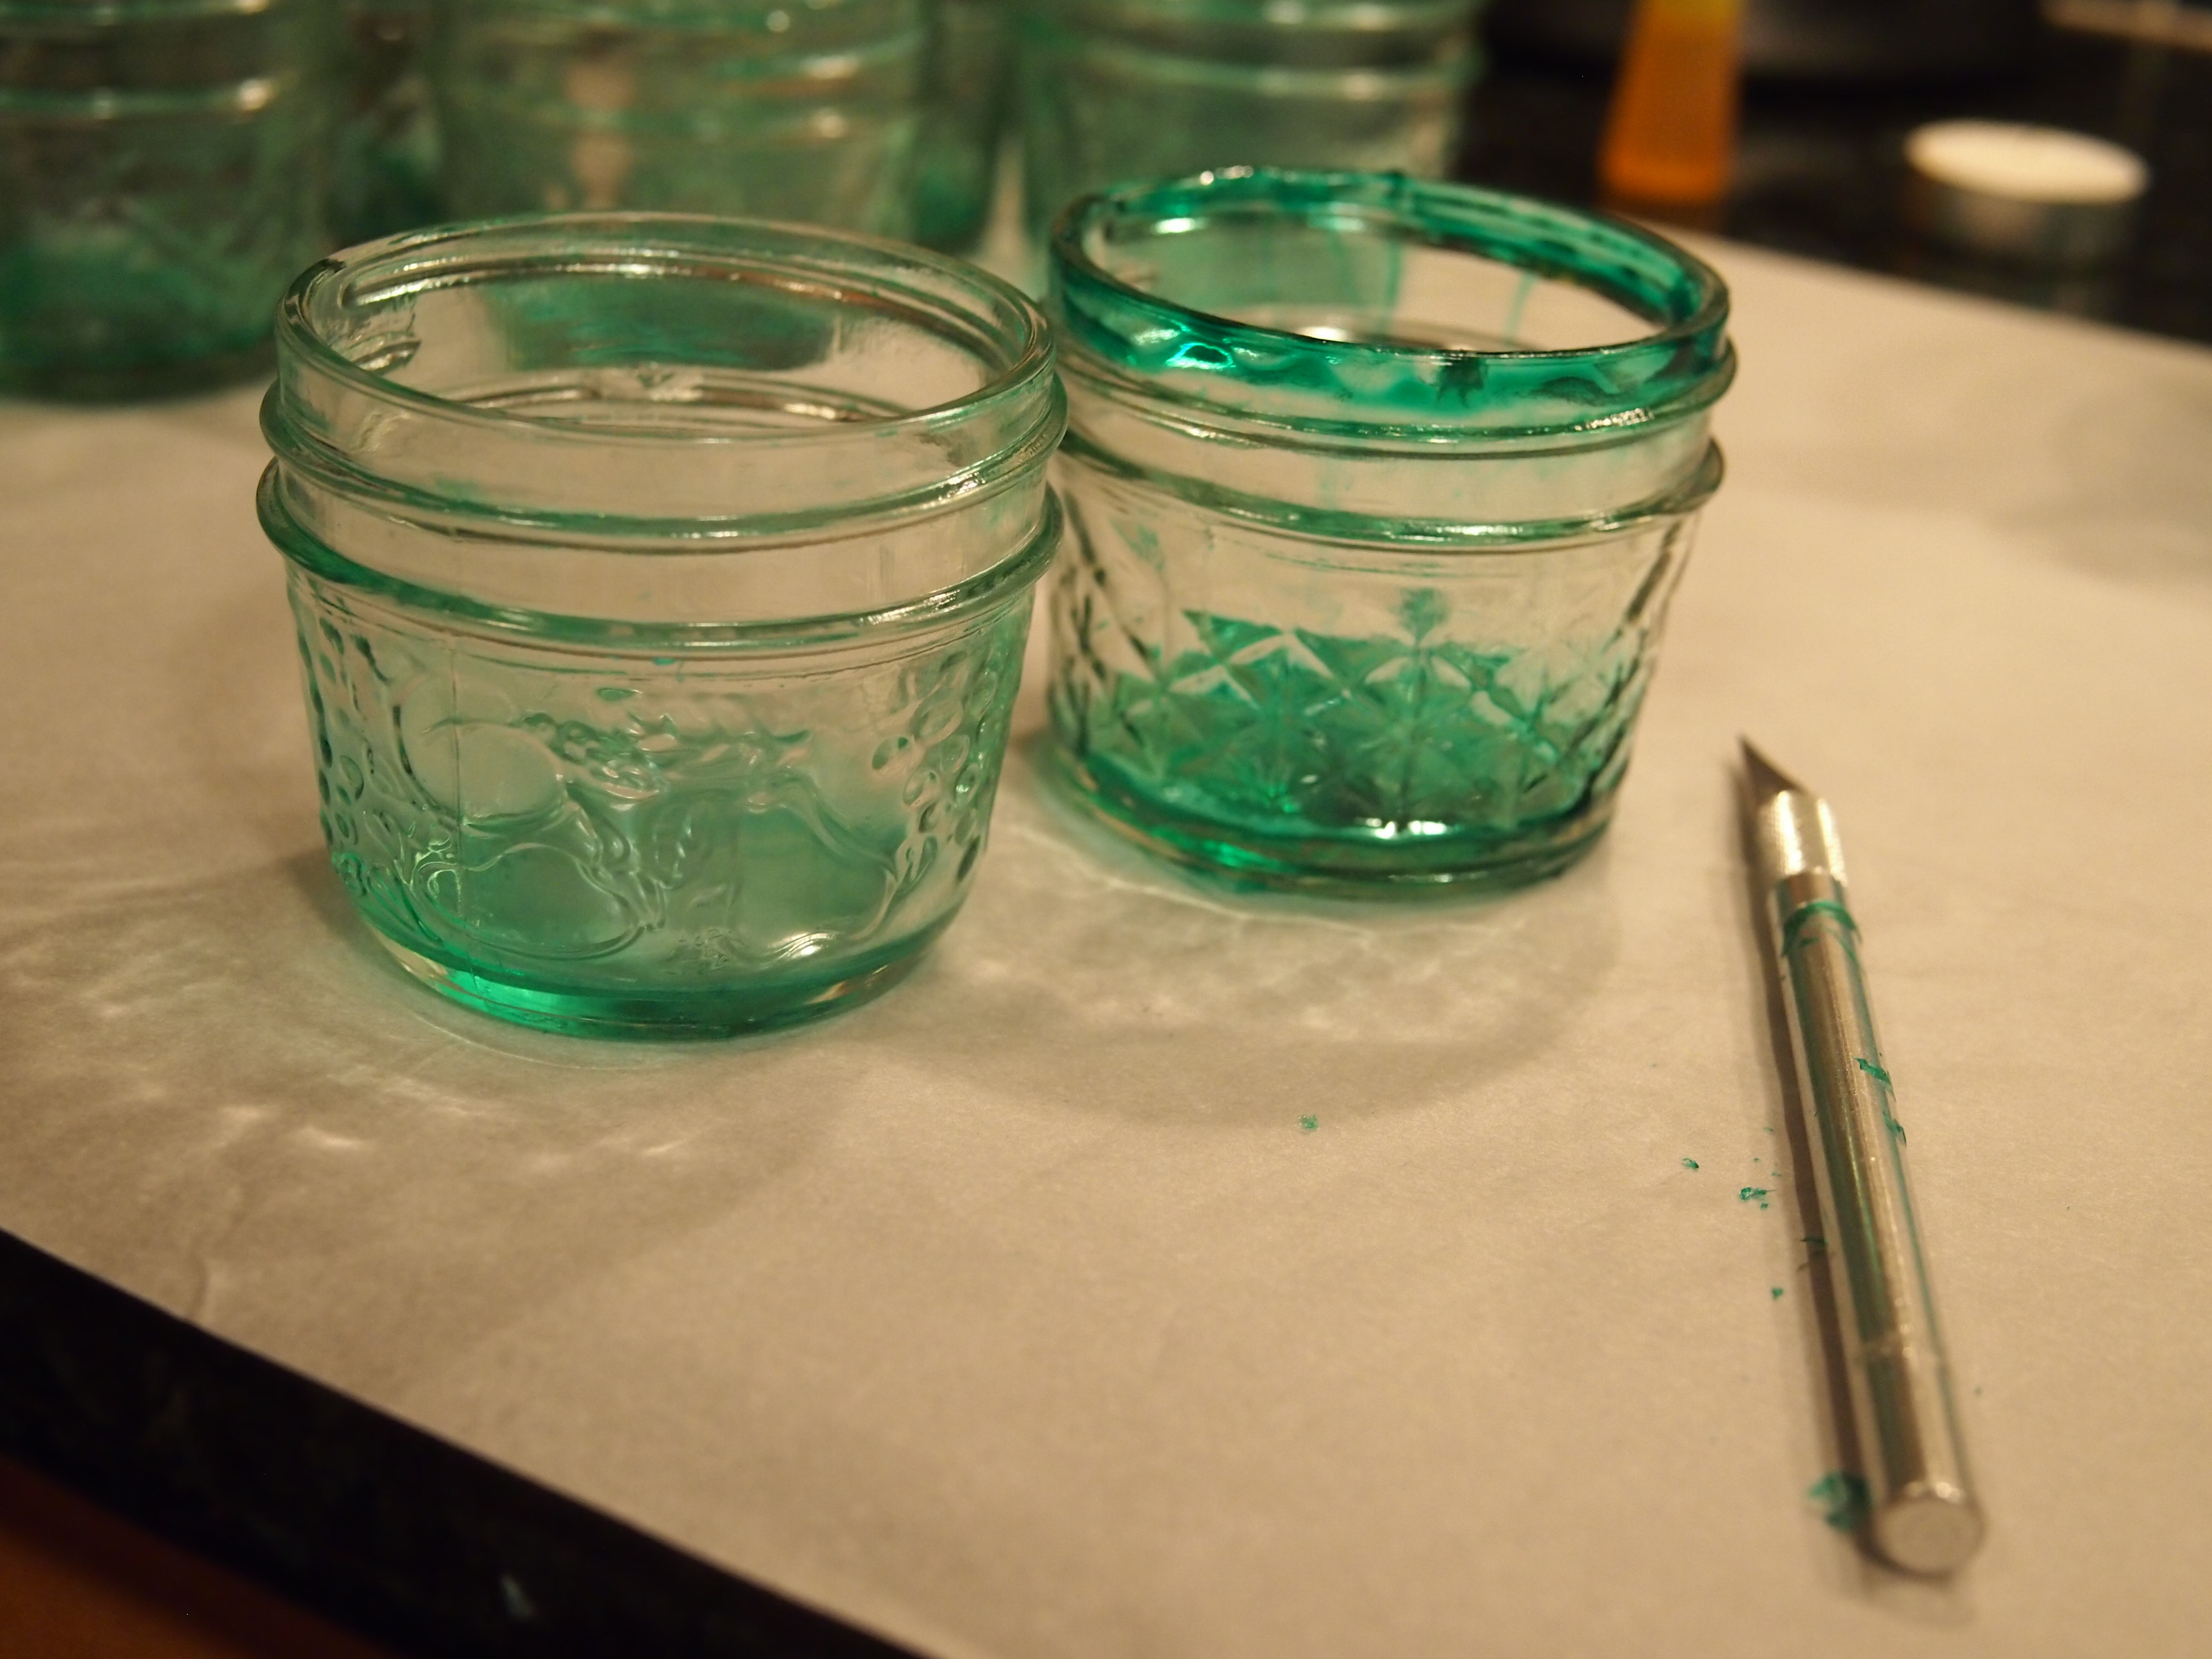 5. Trim (Optional)
If you want a more polished look, once they’ve cooled a bit, trim rim build-up, stuck-on paper, drips, etc. with an exacto knife. However, I found that, once they were fully cooled and transparent, I preferred the messier ones because it gave the jars more color.
Just be careful: It’s rather easy to pull off a good deal of the tinted Modge Podge “skin” that you’ve taken all of this time and effort to apply.
6. Embellish (Optional)
For a pretty (and easy) decorative touch, wrap twine around the rims three times and tack it in place with a glue gun.
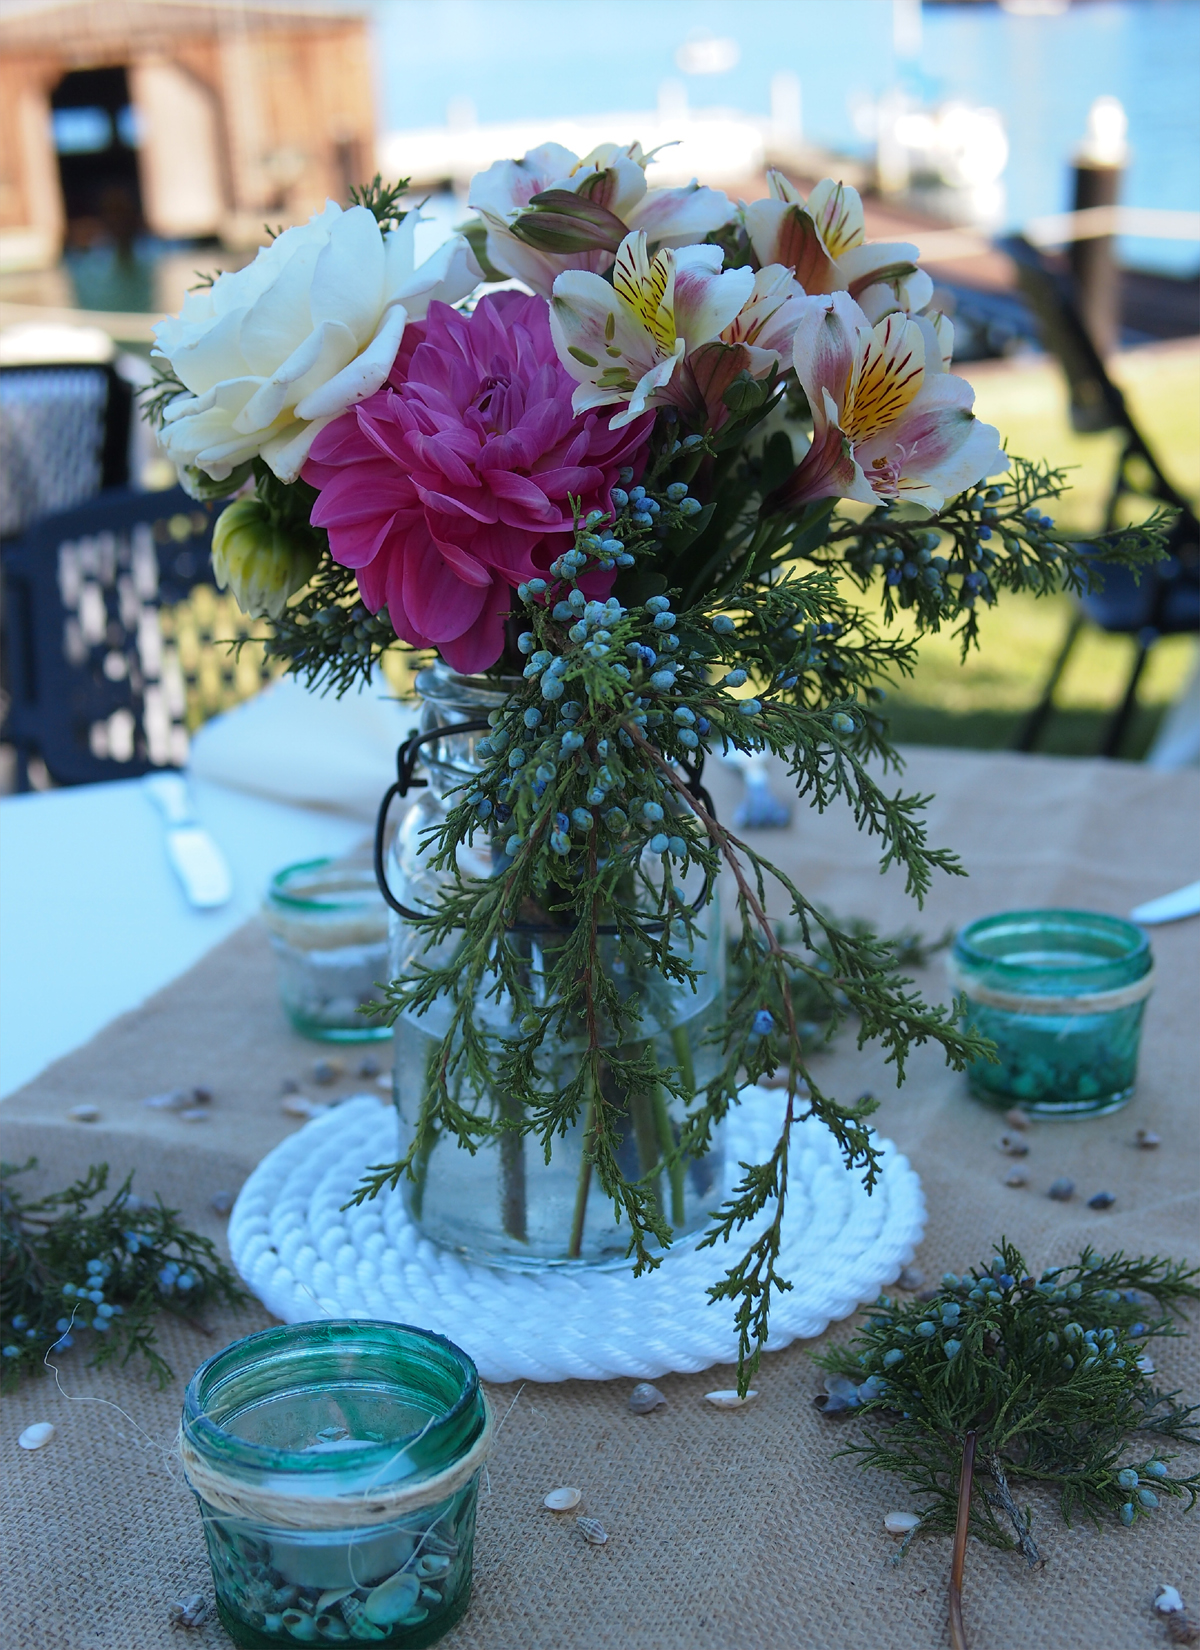 You can drop in a candle on its own or wiggle it into a bit of sand, glitter, tiny seashells, etc.
Note: You will not be able to put water in these. If you do, the Modge Podge will melt off. Otherwise, the heat of the candles had no effect on the integrity of mine, and that was after being lit at the event all night.
